How Stucco Siding Replacement Works: From Inspection to Final Coat
If a hailstorm cracked your stucco or an old wall has gone soft behind the surface, patching may not cut it anymore. Understanding how stucco siding replacement works, from the first inspection to the final color coat, helps you know what a crew should be doing at each stage and whether the bid in front of you covers the real job. This guide walks you through the stucco replacement process steps, the way a repair-first shop would explain it on your porch in Castle Rock. We fix stucco for a living, so we will also tell you where patching still makes sense, because replacing a whole wall you did not need to replace is as much a mistake as smearing stucco repair caulk over a wall that is failing underneath.
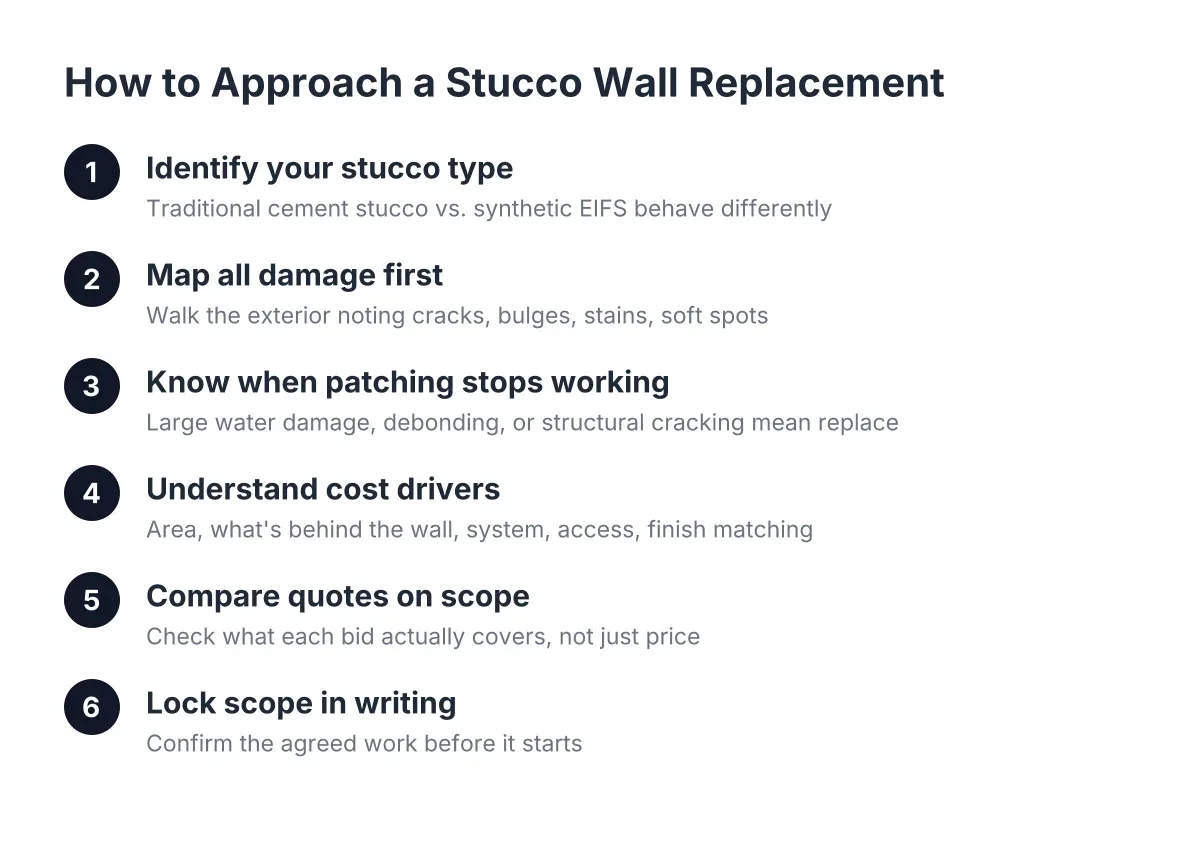
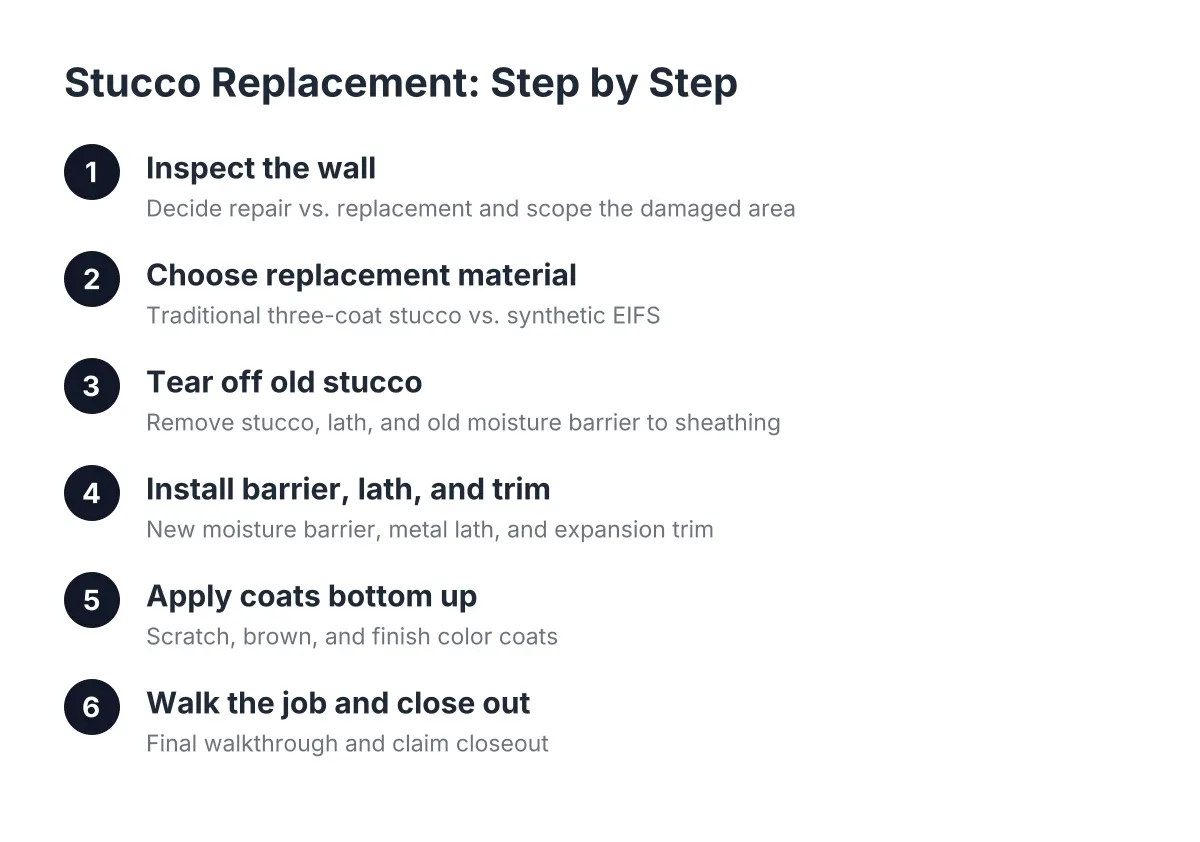
Step 1: Inspect the Wall and Decide Repair vs. Replacement
Start with an honest look at what is actually failing. Hairline cracks, a few chips from hail, or a small hole are patch work. A tube of stucco repair caulk, a bag of quikrete stucco repair mix, or a tub of dap stucco patch handles that class of damage for well under the cost of replacement.
Replacement enters the picture when the damage is not on the surface but under it. Look for these signs:
- Soft or spongy spots when you press on the wall
- Staining or bubbling below windows, which points to water damage behind the stucco
- Wide cracks that keep returning after crack repair
- Stucco pulling away from the wall in sheets, or a hollow sound when you tap large areas
- Rusted or exposed metal lath showing through
Any one of these means the layers behind the finish, the lath or the moisture barrier, may be compromised. Patching over a failed moisture barrier traps water against the sheathing. That is how a $900 repair turns into a rotted wall two years later.
For storm damage, document everything before anyone touches the wall. Photograph each elevation, get close-ups of impact marks and cracks, and date the photos. Your insurance adjuster and your contractor should be looking at the same evidence. Hail is a serious factor here; Colorado's May 8, 2017 Front Range hailstorm caused $2.3 billion in insured damage, the state's costliest catastrophe, according to the National Insurance Crime Bureau. Adjusters see a lot of claims, so clean documentation works in your favor.
How to Scope the Job Without Over- or Under-Buying
Scope the replacement to the failure, not to the whole house by default. If one wall took the hail and the other three are sound, replace the damaged wall from corner to corner and stop there. Corner-to-corner matters: the correct way to redo a deteriorated section is to remove and redo the full wall plane between natural break points, because a patch that ends mid-wall will always show a seam. Breaking at corners, control joints, or trim lines is how the finished work blends.
However, if the inspection turns up widespread water damage, failed lath on multiple elevations, or stucco that has reached the end of its lifespan across the house, a full exterior stucco replacement is the honest answer. Doing it wall by wall over five years usually costs more in total and never matches.
Step 2: Choose Your Replacement Material
Decide what goes back on the wall before demolition starts, because the material drives the layers underneath. For most Castle Rock homes the choice is between traditional three-coat stucco and synthetic stucco, often called EIFS.
Traditional stucco is cement-based, applied in three coats over metal lath: a scratch coat, a brown coat, and a finish color coat. It is hard, handles Colorado sun well, and takes hail impact better than most claddings. Synthetic stucco (EIFS) uses foam insulation board with a thin acrylic finish. It insulates better and resists cracking from movement, but it is softer, so hail dents it more easily, and older EIFS systems without drainage have a history of trapping water. In a hail corridor like Douglas County, that trade-off matters.
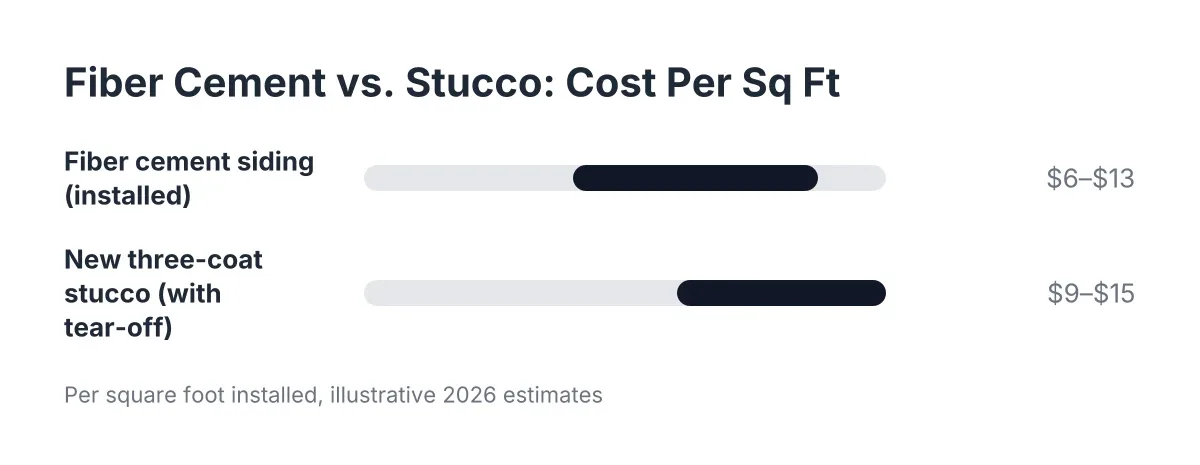
Some homeowners also use replacement as the moment to switch to fiber cement or another siding entirely. That is a fair option, but it changes the trim, flashing, and look of the house, and it is a bigger decision than a like-for-like stucco siding replacement. If the rest of your neighborhood is stucco and your damage is one or two walls, matching the existing material is usually the cleaner path.
Step 3: Tear Off the Old Stucco Down to the Sheathing
Demolition means removing the stucco, the lath, and the old moisture barrier for the full scoped area. A crew that leaves old tar paper in place because "it looks fine" is skipping the step that justified replacement in the first place. This is loud, dusty work; expect a dumpster in the driveway and plastic over nearby windows and landscaping for a day or two on a single wall.
Once the wall is open, the sheathing gets inspected. This is the moment hidden problems surface. Suppose a landlord in Castle Rock opens up a duplex wall expecting a straightforward redo and finds two sheets of rotted OSB below a leaking window. In that scenario, replacing those sheets might add a few hundred dollars and a day to the schedule. That is normal, and it is far cheaper caught now than after the new stucco is on. Build a 10 to 15 percent contingency into your budget for exactly this.
Step 4: Install the Moisture Barrier, Lath, and Trim
Rebuild the wall assembly in layers. First, a new moisture barrier goes over the sheathing, lapped shingle-style so water sheds down and out. Next, metal lath gets fastened over the barrier; this is the skeleton the new stucco grips. Edges get trimmed with channel that allows the wall to expand and contract without cracking, and flashing gets integrated at windows, doors, and rooflines.
This stage is invisible in the finished product and it is where cheap jobs fail. If you check on the work at one point in the project, check here. You want to see continuous barrier with no gaps, lath fastened tight into framing, and metal trim at every edge and opening.
Step 5: Apply the Coats, Bottom Up
Traditional stucco goes on in three coats, and crews work from the bottom of the wall upward. The scratch coat goes on first and gets scored with horizontal grooves so the next layer can bond. After it cures, the brown coat builds the wall to its final thickness and gets floated flat. Each coat needs cure time, often with misting in dry Front Range air, so a single wall typically runs three to five working days and a full house one to two weeks, weather permitting.
This is not a DIY-friendly stage. Rapid-setting patch products are forgiving on a small hole, but hanging a flat, uniform scratch and brown coat across a full wall is harder than it looks. It is the part of the job most worth paying for.
Texture Matching During the Stucco Replacement and Process Steps
The finish coat is where stucco siding replacement work succeeds or fails to the eye. The crew applies the final coat and works the texture, whether that is a sand finish, lace, or a heavier dash, to match the walls that were not replaced. Good texture matching takes test panels and adjustment, not guesswork. If a section dries slightly proud of the surrounding texture, high spots can be knocked down and scraped to blend rather than redone.
Color is the last decision. On older homes, even a matched finish coat will read differently against sun-faded walls. The reliable fix is to paint the whole elevation, or the whole house, after replacement. The standard sequence is pressure wash, prime, then paint. For a storm-damage claim, coordinating stucco and paint under one scope saves you from juggling two contractors and two schedules before winter.
Step 6: Walk the Job and Close Out the Claim
Do a slow walkthrough before final payment. Check that texture blends at the corners where new work meets old, that flashing at windows sheds water, that grade-level edges are terminated cleanly, and that the site is clear of stucco debris and staples. Take finished photos from the same angles as your damage photos; adjusters and future buyers both appreciate the before-and-after record.
For insurance work, keep every document: the scope, the invoice, the material list, and the photo set. Colorado home insurance premiums rose 65 percent over the last five years, with hail cited as a major driver, according to the National Association of Insurance Commissioners. A clean paper trail on this claim protects you on the next one.
One honest caveat: this guide covers a straightforward residential replacement. If your wall shows structural movement, if the home has older EIFS with suspected trapped moisture, or if damage extends behind windows or into framing, bring in a local pro to open up a test section before you sign any scope. Ten minutes of inspection beats guessing on a five-figure job.
Knowing how stucco siding replacement works and understanding the full stucco replacement process steps does not mean you should do it yourself. It means you can read a bid, ask the right questions at each step, and tell the difference between a crew that rebuilds the wall correctly and one that is spraying new finish over an old problem.
If you need stucco repair, Castle Rock Stucco Pros can help.
Prefer to talk it through? Call (720) 797-8506 — a quick call is usually the fastest way to get a straight answer for your situation.