What to Expect During Stucco Siding Replacement: Prep, Dust, and Disruption
If a crack on your wall has grown past what a patch can fix, you are probably wondering what to expect during stucco siding replacement and its associated disruption timeline. The short answer: more disruption than a patch job, less than a full remodel, and a lot depends on how well the crew preps the site. This guide walks through the whole thing from a repair-first point of view, because the honest truth is that most stucco problems in Castle Rock do not need replacement at all. But when they do, you should know what is coming before the first hammer swings.
That is the promise of this article. We will cover when patching stops making sense, what the prep work looks like, how loud and messy the job gets, what weather does to the schedule, and how to live through it whether you occupy the house or rent it out.
First, Make Sure You Actually Need Replacement
Most cracked stucco gets fixed with repair, not replacement. A hairline crack under a window, a spider crack near a corner, or a small hole from a ladder bump are patch jobs. Stucco crack repair and stucco patching handle the bulk of what homeowners call about, and a good local crew will tell you that up front instead of quoting a bigger job.
Replacement enters the conversation when the damage goes past the surface. Here are the situations where patching stops making sense:
- Widespread loose or buckling stucco. If large sections sound hollow when you tap them, or bulge away from the wall, the bond has failed. Patching over loose material traps the problem; rain keeps working on the wood behind it and the damage spreads.
- Water damage behind the wall. Stucco is porous. It absorbs moisture rather than shedding it the way vinyl siding does. If water has been getting in for years, the sheathing or framing behind the stucco may be soft, and you cannot fix that from the outside with a patch.
- Cracks that keep coming back. If you patched a crack two years ago and it reopened wider, something underneath is moving. Repeating the same patch is throwing money at a symptom.
- A patchwork of old repairs. When a third of the wall is previous patches in slightly different textures and colors, replacing the whole section often costs less per year of service life than another round of touch-ups.
There is a middle ground, too. Sometimes one wall needs replacement while the rest of the house only needs crack repair and paint. A straightforward contractor scopes each wall on its own instead of pushing a whole-house job because one elevation failed.
One honest limitation: you cannot always tell from the surface how far water damage runs. If a moisture reading or a test cut shows soft sheathing, the scope can grow after demolition starts. A good crew tells you that possibility before the job begins, not after.
Understanding the Stucco Replacement Disruption Timeline and Prep Work
Preparation sets up everything that follows, and it starts before anyone touches your wall. Expect the crew to protect landscaping, cover windows and vents, set up containment for dust and debris, and stage material where it will not block your driveway for a week. Then comes demolition, which is the loudest and messiest part of the whole job.
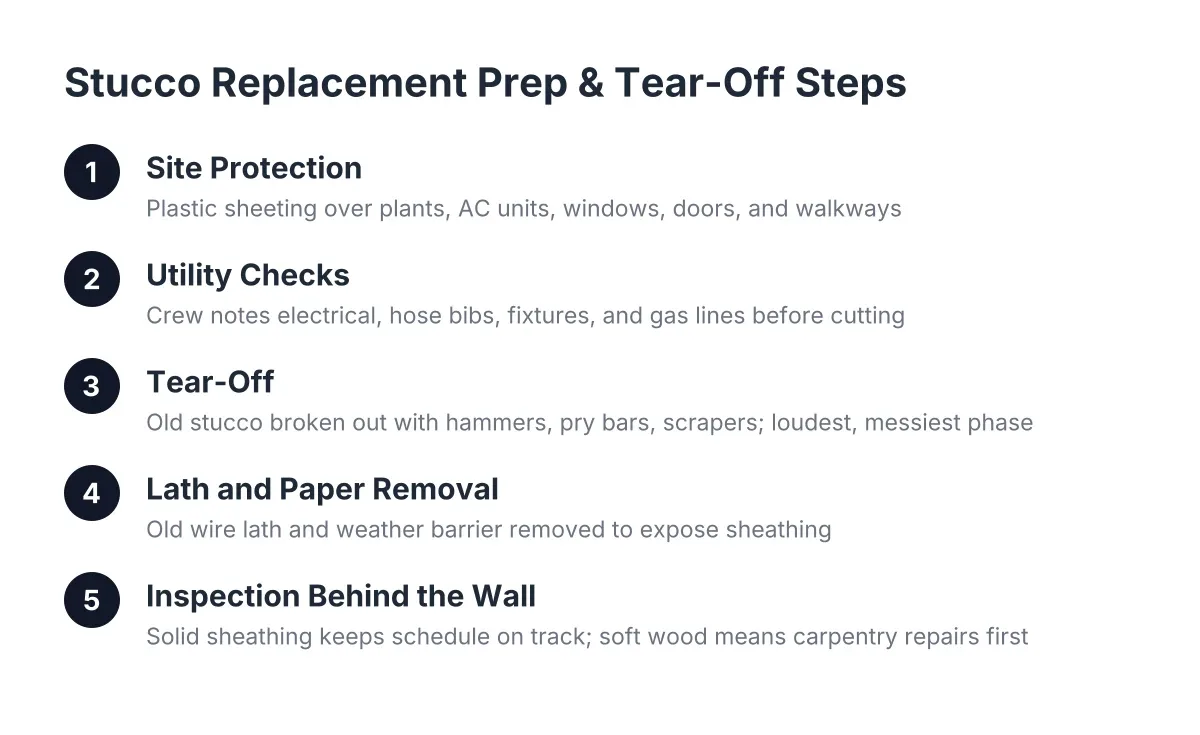
Here is the typical order of work during the prep and tear-off phase:
- Site protection. Plastic sheeting over plants, AC units, windows, and doors near the work area. Drop cloths or plywood paths over walkways.
- Utility checks. The crew notes where electrical penetrations, hose bibs, light fixtures, and gas lines pass through the stucco so nothing gets cut blind.
- Tear-off. Workers break out the old stucco with hammers, pry bars, and scrapers. Loose or failing material comes off with putty knives, wire brushes, and scraping tools, sometimes helped by light pressure washing. Every bit of loose material has to come off; leaving any in place lets rain keep expanding damage in the wood behind it.
- Lath and paper removal. The old wire lath and weather barrier come off so the crew can see the sheathing underneath.
- Inspection of what is behind the wall. This is the moment of truth. Solid sheathing means the job proceeds on schedule. Soft or rotted wood means carpentry repairs first.
One detail worth knowing if only part of a wall comes down: when a crew cuts stucco to size an opening, a clean grinder cut is actually a problem. The torn edge needs to leave the wire lath exposed and ragged so the new weather barrier and lath can tie into the old. A clean cut forces the crew to open up more wall, which adds cost. If your contractor explains this before cutting, that is a sign they know the material.
Expect the tear-off phase to produce a dumpster's worth of heavy debris, a steady hammering noise during work hours, and fine dust that settles on everything nearby. Close your windows on that side of the house and move patio furniture before day one.
How Loud and Messy Does the Work Get?
Stucco replacement is a loud, dusty job for the first few days and a quieter one after that. Demolition means hammering, scraping, and debris hitting the ground for one to three days on a typical wall section, contributing significantly to the overall stucco replacement disruption timeline. After tear-off, the noise drops to the level of normal construction: staplers for lath, mixers running for base coats, and trowel work that is nearly silent.
Dust is the part people underestimate. Breaking out old cement stucco creates fine gray dust that drifts, settles on cars, and works into window screens. A careful crew contains most of it with sheeting and cleanup at the end of each day, but "most" is the honest word. Plan to rinse nearby surfaces when the job wraps.
In addition, expect some vibration. Hammering on one wall travels through framing, so pictures on the inside of that wall should come down. Vibration can also stress adjacent finishes. For example, removing and replacing a panel or section next to intact stucco can itself cause spider-web hairline cracking in the surrounding material. A crew that knows stucco works the edges carefully and plans to blend any new hairlines during finishing, but it is worth asking how they handle it before work starts.
Access matters too. The crew needs a clear path from the street to the work wall, room for scaffolding on taller sections, and a spot for the mixer and sand. If the wall faces a narrow side yard shared with a neighbor, talk to the neighbor before the crew shows up, not after their gate is blocked.
Stucco Replacement Disruption Timeline During the Build-Back Phase
After tear-off and any wood repairs, the wall goes back together in layers, and each layer needs time before the next one goes on. Expect new weather barrier and wire lath first, then a scratch coat, a brown coat, and a finish coat. The waiting between coats is not the crew being slow; cement-based stucco has to cure, and rushing it causes the cracks you were trying to escape.
This is where traditional stucco and synthetic systems part ways, and it affects what you will live through:
- Traditional three-coat stucco means multiple visits spread across one to several weeks, with curing days in between when nobody is on site. The wall looks unfinished for a while. That is normal.
- Synthetic stucco (EIFS) goes up as foam board, a base coat with mesh, and a finish coat. The schedule is usually tighter, but EIFS is a different wall system with its own drainage requirements, and matching it to an existing traditional stucco house is rarely clean. On most Castle Rock homes with cement stucco, replacing like with like is the simpler call.
Texture matching is the finishing question that matters most if only part of the house is being replaced. New stucco next to 20-year-old stucco will not match on its own; the crew has to replicate the texture by hand and the color through pigment or paint. When a patch or new section does not quite match, a skilled finisher can often blend it by knocking down and scraping high spots rather than redoing the coat. On corners, the technically correct fix for deteriorated stucco is to take the wall section back to the corners and redo it edge to edge, because a spot patch in the middle of a corner almost always shows.
Finally, expect a paint phase if your stucco is painted rather than integrally colored. The standard sequence is pressure wash, prime, then paint, and the crew should wash the whole elevation, not just the new section, so the final color reads even.
Weather Will Push Your Schedule Around
Colorado weather is the one variable nobody controls, and it hits stucco work harder than most trades. Rain or snow stops patch, coat, and paint work cold; a full day of precipitation means a full day of stoppage. Freezing temperatures stop cement work too, which is why late spring through early fall is the busy season and why winter replacement quotes often come with longer, looser timelines.
Hail is the other local factor. Castle Rock sits in one of the most hail-active regions in the country. Three Colorado cities, Colorado Springs, Denver, and Greeley, rank among the top 10 U.S. cities for hail loss claims, together representing 10% of total hail loss claims between 2018 and 2020, according to the Rocky Mountain Insurance Information Association. Hail damage is a common reason stucco walls end up on the replacement list in the first place, and a mid-project hailstorm can damage fresh coats that have not cured.
The insurance angle is worth a sentence for anyone weighing a claim against paying out of pocket. Colorado home insurance premiums rose 65% over the last five years, with hail cited as a major driver, according to the National Association of Insurance Commissioners. A modest stucco repair paid directly can be the cheaper long-term path compared with a claim that nudges your premium; talk to your agent before filing for cosmetic damage.
Practically, build weather slack into your expectations. A quoted one-week wall replacement in May can stretch to two weeks if afternoon storms roll through. That is not the crew failing; that is cement chemistry and Front Range weather.
Living Through It: Owner-Occupied vs. Rental Property
How disruptive the job feels depends on who is in the house. For an owner-occupant, the main costs are noise during work hours, a blocked side of the yard, dust on the windows, and strangers on scaffolding outside the bedroom for a week or two. You can stay in the house the whole time. Plan around the loud demolition days, keep pets inside, and expect the crew to need outdoor water and power access.
For a small landlord, the calculation is different, and timing is everything. Suppose you own a duplex in Castle Rock and a move-out walkthrough reveals bulging stucco and a water stain inside the wall of one unit. In that scenario, you have a vacancy window, and the question is whether the repair fits inside it. A sectional replacement on one wall, say in the ballpark of $2,000 to $5,000 as a rough illustrative range depending on size and hidden damage, can usually finish inside a typical turnover window if weather cooperates. A full-elevation replacement might not, and you need to know that before you list the unit.
A few landlord-specific points about what to expect during the stucco siding work on an occupied or soon-to-be-occupied rental:
- Tenant notice. If a tenant is in place, give written notice of the work dates, the noise, and any yard access the crew needs.
- Scope discipline. Decide up front whether you are paying for a perfect texture match or a sound, weathertight wall that passes inspection. Both are legitimate; they cost different amounts. Be clear with the contractor which one you are buying.
- Hidden-damage contingency. Budget a cushion for wood repair behind the stucco. Water damage found after tear-off is the most common reason a rental repair blows past its bid.
- Photograph everything. Before, during, and after. It protects you with tenants, insurers, and your own records at the next turnover.
The trade-off worth naming: on a rental, chasing cosmetic perfection on texture matching rarely pays. On the home you live in and plan to sell as a move-up buyer someday, it usually does. Same wall, different right answer.
Questions to Ask Before the Crew Shows Up
The difference between a smooth replacement and a frustrating one usually comes down to what got discussed before day one. A local crew that works stucco every day will have ready answers to all of these. Vague answers are your signal to keep shopping.
- How much of the wall are you removing, and why that much? Listen for reasoning tied to loose material, water damage, and tie-in edges, not a one-size answer.
- What happens if you find rotted sheathing after tear-off? You want a unit price or a clear change-order process, not a shrug.
- How will you tie new stucco into the old? The answer should mention lath overlap and weather barrier lapping, not just "we blend it."
- How will you match my existing texture and color, and can I see a sample area first?
- What is your weather plan? Cure times, what stops work, and how delays get communicated.
- Who cleans up, and when? Daily cleanup versus end-of-job cleanup changes how livable your yard is for two weeks.
- Who do I call during the job? A direct local number beats a scheduling line every time.
For a homeowner who has been staring at a crack for months wondering if it is serious, the best outcome is often a straight answer that a repair will do the job. Full stucco siding replacement is the right call only when the wall underneath says so: loose material across wide areas, soft wood behind the surface, or cracks that outrun every patch. When replacement is the answer, knowing the prep, the dust, the curing waits, and the weather risk ahead of time turns a stressful project into a predictable one. The disruption is real but temporary; a wall rebuilt correctly over sound wood is the part that lasts.
If you need stucco repair, Castle Rock Stucco Pros can help.
Prefer to talk it through? Call (720) 797-8506 — a quick call is usually the fastest way to get a straight answer for your situation.