New Stucco Installation Timeline: Prep to Cure in Castle Rock’s Climate
Builders and homeowners ask the same question when stucco is on the schedule: how long does this actually take? The honest answer depends on weather, crew consistency, and stucco cure time that cannot be rushed. This guide walks through the new stucco installation timeline step by step, from prep to final cure, with the Castle Rock climate factored in at every stage. If you are a builder trying to hold a schedule across a subdivision, or a homeowner planning around a remodel, the steps below show where the time goes and where it cannot be compressed.
One note up front for builders: the difference between a stucco sub who holds schedule and one who blows it is almost never application speed. It is weather planning and cure discipline. A crew that rushes cure on house three will hand you crack repair calls on houses one through ten a year later. The timeline below is the version that produces walls nobody has to come back for.
Step 1: Plan the Schedule Around Castle Rock Weather
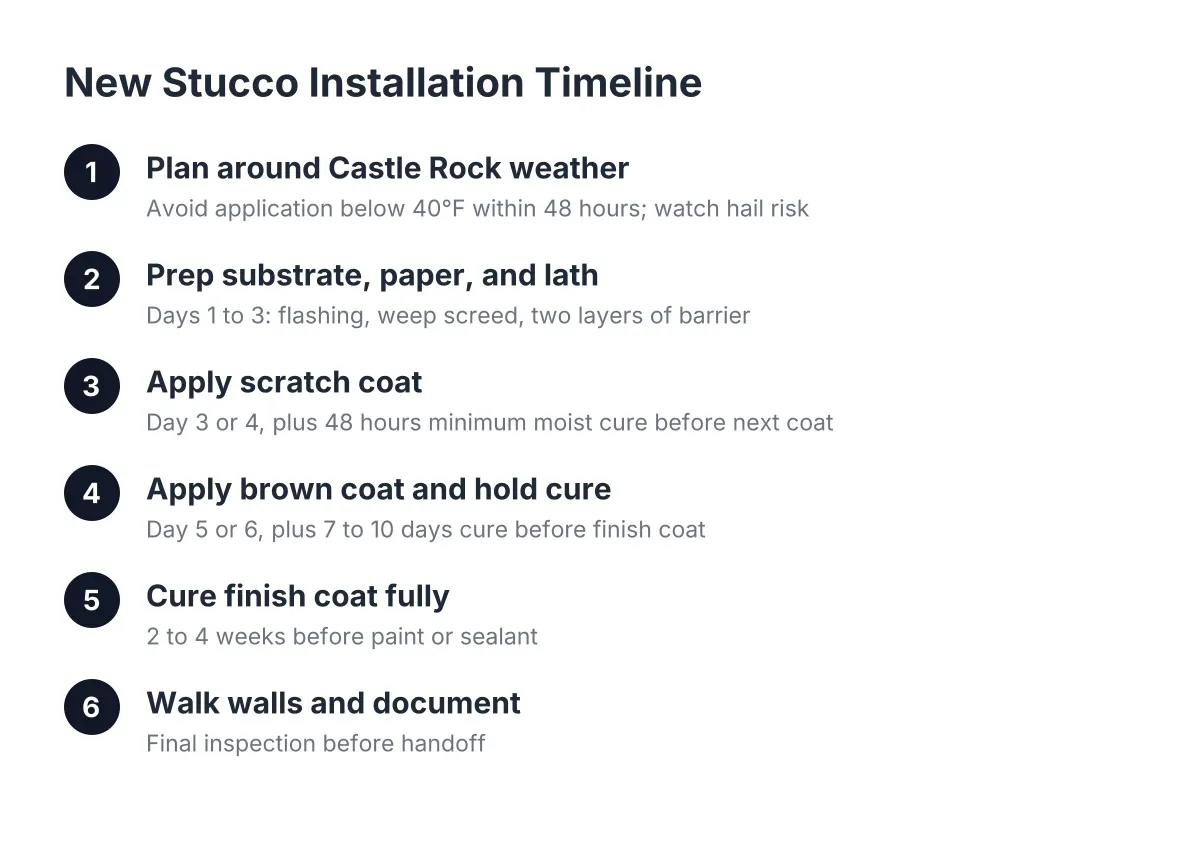
Before anyone mixes a bag, look at the forecast and the season. Castle Rock sits above 6,000 feet. Temperature swings of 30 degrees in a day are normal, and freeze risk runs from October into May. Stucco should not be applied when temperatures will drop below about 40 degrees within 48 hours, and hot, dry, windy days pull moisture out of fresh coats too fast.
For a builder sequencing multiple homes, this is the single biggest schedule variable. A sub who promises the same production pace in January as in June is not being straight with you. The realistic pattern looks like this:
- Late spring through early fall: full production pace, normal cure windows
- Shoulder seasons: shorter daily application windows, tenting or heat may be needed
- Deep winter: expect delays, or budget for cold-weather protection on every house
Therefore, build float into the exterior schedule rather than assuming stucco runs like drywall. Hail is the other local factor. Colorado had 182,591 hail insurance claims from 2013 to 2015, second only to Texas, according to Rocky Mountain Insurance Information Association. A hail event mid-cure can damage a soft brown coat, so a good crew watches storm forecasts and covers work when cells are moving through.
Step 2: Prep the Substrate, Paper, and Lath (Days 1 to 3)
Prep is where most long-term stucco failures start, so do not let anyone shortcut it. On new construction, the sheathing gets inspected first for gaps, damage, and fastener issues. Then two layers of weather-resistive barrier go on, lapped shingle-style so water drains out, never in.
Next comes flashing at windows, doors, and roof-to-wall transitions, followed by lath fastened into framing, not just sheathing. Weep screed goes at the bottom of every wall so moisture behind the stucco has a way out. This matters in Castle Rock more than most places, because when building paper fails behind stucco, water intrusion follows. Delayed repairs make it worse; paper that sits behind a cracked wall for years turns brittle, and normal wall flexing can tear it, which turns a small crack into a rot problem.
For a typical single home, prep runs one to three days. Across a subdivision, a reliable sub standardizes this stage so every house gets the same flashing details, which is what keeps callback rates flat across the whole project instead of varying house to house.
Step 3: Apply the Scratch Coat (Day 3 or 4, Plus 48 Hours Minimum)
Traditional stucco goes on in three coats: scratch, brown, and finish. The scratch coat is the first cement layer, pushed through the lath and then raked with horizontal grooves. Those grooves are not decoration; they give the next coat something to grip.
Application on an average home takes one day with a full crew. Then the waiting starts. The scratch coat needs at least 48 hours of moist curing before the brown coat goes on, and in dry Castle Rock air the crew should mist the wall during that window so it cures instead of just drying out. Cement that dries too fast is weak cement. This is the first point in the new stucco installation timeline where a builder pushing for speed actually buys future cracks. Understanding stucco cure time at this stage prevents hasty decisions that compromise the final product.
Step 4: Apply the Brown Coat and Hold for Cure (Day 5 or 6, Plus 7 to 10 Days)
The brown coat is the leveling coat. It gets applied over the cured scratch coat, screeded flat, and floated to a consistent plane. One day of application for a typical house, sometimes two on larger or cut-up elevations.
However, here is where the timeline stretches and where the arguments start. The brown coat should cure 7 to 10 days before the finish coat, and longer is better. Moist curing in the first couple of days helps, especially in summer when humidity here drops into the teens. Hairline shrinkage cracks that show up during this window are normal and get bridged by the finish coat; that is part of why the wait exists. Respecting proper stucco cure time during this phase is critical to avoiding shrinkage cracks that compromise wall integrity.
Suppose a builder has eight homes in a Castle Rock subdivision on two-week stucco rotations. In that scenario, a disciplined sub runs the houses in a staggered sequence: scratch on house one, brown on house one while scratching house two, finish on house one while house two browns out. The crew never sits idle, and no house gets its cure window shaved to hit a date. That staggering is how a specialist delivers both schedule and consistency; a crew that works one house at a time start to finish cannot do it without cutting cure time somewhere.
Step 5: Understanding How Stucco Cure and Application Timing Affect Results
The finish coat carries the color and texture, so this is the coat everyone sees for the next 30 years. Before application, the crew wets the brown coat; a damp substrate bonds and cures far better than a dry one, especially in our thin, dry air. Loose burrs or rough spots get scraped off first so the finish bonds to clean material.
Consistency matters most here. On a multi-home project, the same finish crew should run all the texture work, because two applicators with different hand pressure produce visibly different walls. Texture matching is a skill, not a default. On repairs it is the difference between a patch that disappears and one that announces itself, and on new construction stucco and siding projects it is the difference between a subdivision that looks uniform and one that looks pieced together.
Application takes one to two days per house. Afterward, keep sprinklers, mud splash, and trades with ladders away from the walls for several days.
What the Full New Stucco Installation Timeline Adds Up To
For one average home in good weather, plan on this:
- Prep, paper, lath, and flashing: 1 to 3 days
- Scratch coat: 1 day, then 48 hours minimum cure
- Brown coat: 1 to 2 days, then 7 to 10 days cure
- Finish coat: 1 to 2 days
- Full cure before paint or sealant: 2 to 4 more weeks
That puts the active work at about a week and the total new stucco installation timeline at three to six weeks, wall to paint-ready wall. Cold snaps, hail delays, and large or complex elevations push it longer. Anyone quoting a one-week start-to-finish stucco job in 2026 is either describing a one-coat synthetic system, which has different trade-offs, or planning to skip cure time on your house.
Step 6: Let the Finish Cure Fully Before Paint or Sealant (2 to 4 Weeks)
Fresh stucco holds a lot of alkaline moisture, and paint applied too early peels or discolors. Plan on 2 to 4 weeks of cure before coating a new three-coat wall, and confirm with a moisture check rather than the calendar alone. Small patches are different; a fresh stucco patch usually needs only an overnight dry before paint, so repair work does not carry the same long hold.
When paint day comes, masonry paint is the standard follow-up on finished stucco. A stucco paint roller with a thick nap works the coating into the texture better than a standard roller, and sprayer-plus-backroll is the common approach on full elevations. For sealant joints at penetrations, backer rod, a closed-cell foam cord, goes into the joint first so the sealant has a proper backing, according to Sika.
Step 7: Walk the Walls and Document Before Handoff
The last step takes an hour and saves arguments later. Walk every elevation in raking light, morning or late afternoon, when low-angle sun shows texture inconsistencies and shadowed cracks that midday light hides. Check weep screeds for mortar blockage, confirm sealant at every penetration, and photograph each wall.
For builders, that documentation is your consistency record across the subdivision. For homeowners, those photos are your baseline; if a dark stain or soft spot shows up near a window two years from now, you can show exactly what the wall looked like at handoff, which speeds up both diagnosis and any insurance conversation. That matters in this market. Colorado home insurance premiums rose 65 percent over the last five years, with hail a major driver, according to the National Association of Insurance Commissioners, and carriers look hard at documentation on exterior claims.
One honest limitation: this timeline covers traditional three-coat stucco on new construction. One-coat systems, EIFS, and stucco over masonry run different schedules, and any wall that already shows staining, soft spots, or suspected water damage needs a local inspection before anyone talks timeline, because what is behind the stucco decides the job. When in doubt, have someone who works with stucco every day open up a test spot before committing to dates.
If you need stucco repair, Castle Rock Stucco Pros can help.
Prefer to talk it through? Call (720) 797-8506 — a quick call is usually the fastest way to get a straight answer for your situation.