Step-by-Step Stucco Crack Repair: Cleaning, Patching, and Texture Matching
A crack in your stucco is the wall telling you something. Sometimes it says the finish coat shrank a little as it cured, which is normal. Sometimes it says water is getting behind the wall, or the house is moving in a way it should not. This guide walks through the step-by-step stucco crack texture matching process the way a crew that fixes stucco every day in Castle Rock actually does it: read the crack first, clean it, patch it, then match the texture so the fix disappears instead of announcing itself.
Follow the steps in order. Most failed repairs skip one of them, usually the cleaning or the texture match, and the crack comes back or the patch stands out like a scar.
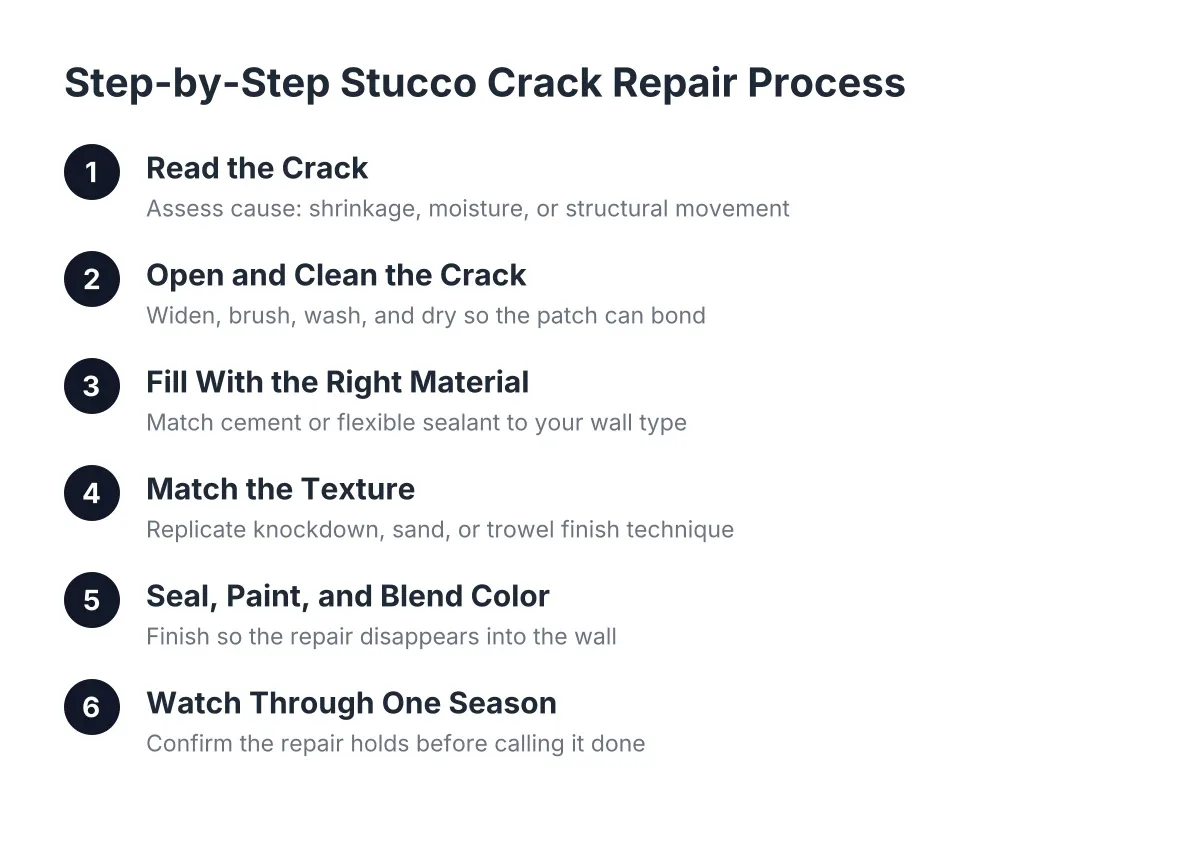
Step 1: Read the Crack Before You Touch It
Start by figuring out what the crack is telling you, because the repair depends on the cause. A hairline crack under about 1/16 inch that runs randomly across a flat wall is usually shrinkage or normal thermal movement. Colorado's freeze-thaw swings work stucco hard, and thin surface cracks are common signs of stucco problems that stay cosmetic.
However, some cracks deserve more attention before you patch anything:
- Cracks wider than about 1/8 inch, or cracks you can slip a coin into
- Stair-step cracks that follow a diagonal path, especially from window or door corners
- Cracks paired with soft, bulging, or stained stucco, which points to water damage behind the wall
- Cracks that grew noticeably over one season, or reopened after a previous patch
- Chips, dents, and spider cracking after a hailstorm, which is impact damage, not settling
If you see the wider or stair-step kind, patching alone treats the symptom. The movement or moisture causing it should be addressed, or the crack returns through the new material. This is the one point in the process where calling a local pro for a look makes sense even if you plan to do the patch yourself. If a storm caused the damage, photograph everything before repair; your insurance adjuster will want dated photos and a written estimate. Hail is a real driver here: Colorado logged 182,591 hail insurance claims from 2013 to 2015, second only to Texas, according to the Rocky Mountain Insurance Information Association.
Step 2: Open and Clean the Crack So the Patch Can Bond
Next, prepare the crack. This is the step homeowners skip most often, and it is why caulk smeared over a dirty hairline peels out within a year. New patch material only holds if it bonds to sound, clean stucco. Any dust, loose grit, chalky paint, or oil on the surface blocks that bond.
Here is the cleaning sequence:
- Widen a hairline crack slightly with the corner of a putty knife or a small chisel so the patch material has something to grip. You want a shallow V shape, not a gouge.
- Brush out the crack with a stiff nylon brush, then blow or vacuum out the dust.
- Wash the area around the crack and let it dry fully. In Castle Rock's dry air that can be a few hours; after rain, wait a day.
- Knock off any loose or flaking stucco at the edges. If chunks keep coming off, stop; you are looking at a patching job, not a crack fill, and possibly water damage underneath.
For deeper cracks, install backer rod before sealing. Backer rod is a closed-cell foam cord pressed into the crack to create a backing for the sealant, according to Sika. It keeps the sealant at the right depth so it can stretch instead of tearing.
Step 3: Fill the Crack With the Right Material
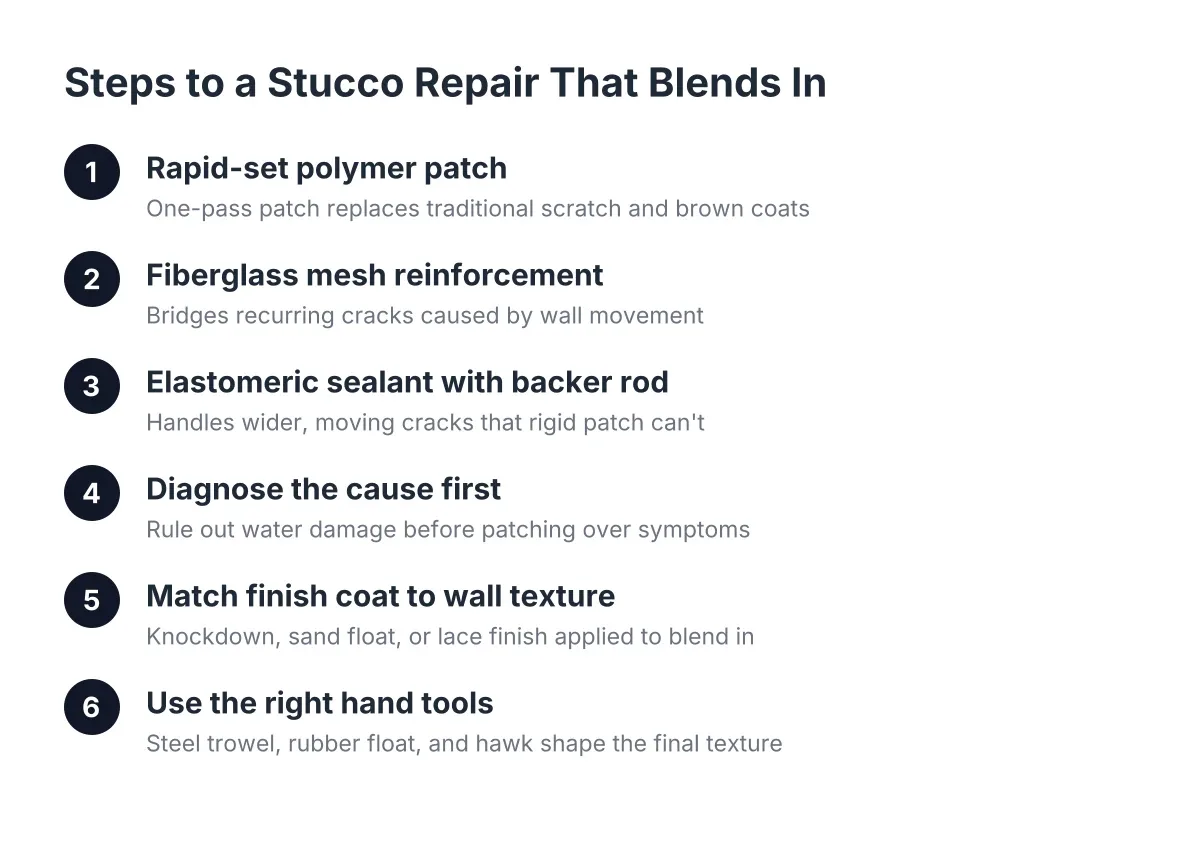
Now fill it. The right material depends on the crack and on what your wall is made of. Cement-based stucco walls generally want a cement-based or sanded acrylic patch that moves and weathers like the wall around it. Foam-backed synthetic stucco systems want flexible, compatible sealants; hard cement patches on a foam system crack again fast. That foam versus cement distinction is where a lot of DIY stucco crack repair kits go wrong, because one tube is sold for every wall type.
For a typical hairline crack in cement stucco:
- Work a sanded elastomeric or acrylic stucco caulk into the crack, pressing it in rather than laying a bead on top.
- Tool it flush with the surface. A smooth, proud bead of caulk will telegraph through paint forever.
- For wider cracks, apply a stucco patching compound over the filled crack in thin passes, feathering the edges past the crack on both sides.
Work from the bottom of the crack upward; that is standard practice on stucco so material laps correctly and does not sag. In addition, mind your working time. Fast-setting fillers give you only minutes before they stiffen, so mix small batches. As a comparison point, catalyzed body-filler-type products start setting up within about 2 minutes of mixing, according to 3M; stucco patch products vary, so read the label and do not mix more than you can place.
Let the patch cure per the manufacturer's directions before texturing. Rushing this step is the second most common reason a repair fails.
Step 4: Stucco Crack Texture Matching Techniques for Seamless Repairs
The texture match is what separates a repair you forget about from a patch you stare at every time you pull into the driveway. Stucco crack texture matching is critical because a patch that does not match stays visible even after painting. Paint changes the color, not the shadow lines, and texture is all shadow lines.
First, identify your existing finish. Most Castle Rock homes have one of a few finishes: a knockdown or dash texture, a sand or float finish, or a smoother trowel finish. Then replicate the technique, not just the material:
- For a knockdown dash texture, spray or flick finish coat onto the patched area, let it stiffen slightly, then lightly trowel the high points down so it blends into the surrounding wall.
- For a sand finish, float the patch with a sponge or foam float in circular motions to raise the grain.
- Some steel-trowel patch products produce a stucco-like texture on their own, which can be enough for smoother finishes.
Feather the textured area past the patch edges so there is no hard line. If your first attempt sits too proud, you can often blend it by scraping and knocking down the high spots rather than tearing the patch out. When texture or color simply will not match, the honest fallback is painting the whole wall section so everything reads uniform. A poor texture match is usually the giveaway that whoever did the last repair did not know the original finish technique, and it is the most common reason homeowners call a stucco crack repair crew to redo work.
Step 5: Seal, Paint, and Blend the Color
Once the texture is set and cured, prime the patch with a masonry primer so paint absorbs evenly. Unprimed patches flash lighter or darker than the wall around them. Then paint the patch, and be realistic: exterior paint fades, so a perfect can-match from years ago will still show. Painting corner to corner on that wall plane, or the full wall section, gives a uniform result a spot touch-up cannot.
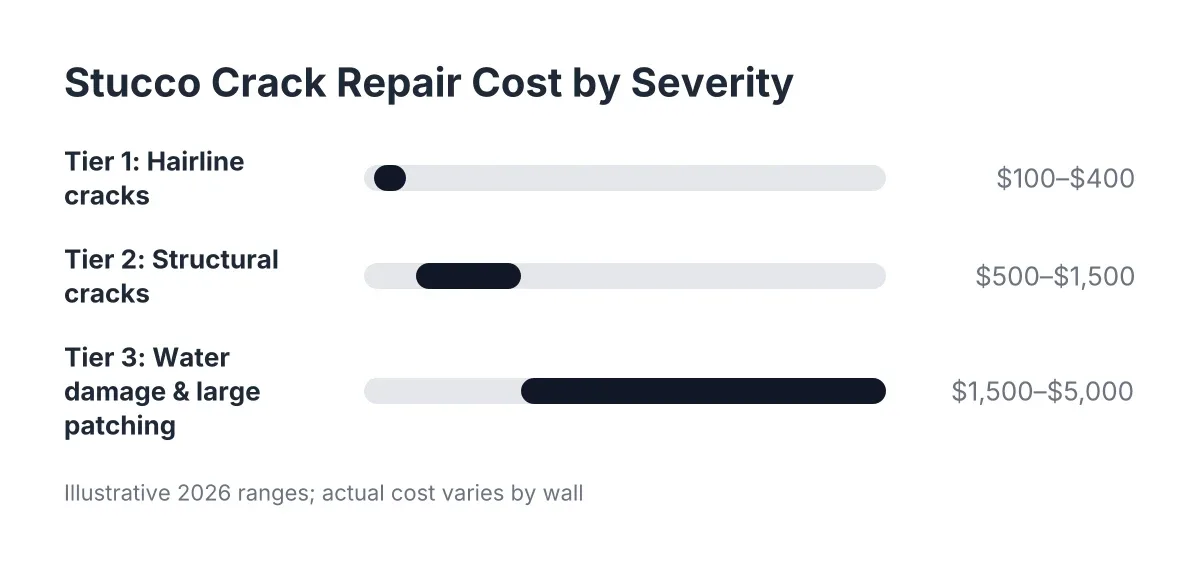
For example, suppose a homeowner in Founders Village spots a hairline crack spreading from a window corner after a hard winter. In that scenario, a typical crew would open and clean the crack, fill it with sanded elastomeric patch, and during stucco crack texture matching and knock down, would then paint the wall section from break to break. As an illustrative estimate, a straightforward crack repair like that often lands in the low hundreds of dollars, while repairs involving water damage behind the stucco or storm impact across multiple walls can run into the thousands. Stucco crack repair costs scale with what is behind the crack, not the length of the crack itself.
Step 6: Watch the Repair Through One Full Season
Finally, monitor the fix. Mark the ends of where the crack was with a light pencil tick and check it after the next freeze-thaw cycle and the next big temperature swing. A sound repair on a stable wall stays closed. If the crack reopens through the patch, the wall is moving or water is still getting in, and it is time for a professional evaluation rather than a third tube of caulk.
Watching matters more here than in milder climates. Colorado weather punishes exterior stucco, and the insurance numbers reflect it: home insurance premiums in the state rose 65% over the last five years, with hail cited as a major driver, according to the National Association of Insurance Commissioners. Catching a small crack before the next storm season is the cheap version of this problem.
Where the Step-by-Step Stucco Crack Fix Ends and a Pro Begins
Most hairline cracks are a manageable weekend job if you follow the steps above and respect the cleaning and cure times. That said, be honest about the limits. Stair-step cracks, cracks wider than 1/8 inch, soft or stained stucco, recurring cracks, and hail damage tied to an insurance claim all call for a local stucco repair pro. A deteriorated corner, for instance, is technically best repaired by removing the stucco and repatching the full wall section corner to corner, not spot-patching, and that is not a DIY-scale job.
The step-by-step stucco crack repair process itself is not complicated: read it, clean it, fill it, texture it, paint it, watch it. What takes practice is the texture match and knowing when the crack is a symptom of something bigger. If you are unsure which kind of crack you are looking at, a straightforward local opinion before you buy materials is cheaper than doing the repair twice.
If you need stucco repair, Castle Rock Stucco Pros can help.
Prefer to talk it through? Call (720) 797-8506 — a quick call is usually the fastest way to get a straight answer for your situation.